When it comes to maintaining your guitar, one of the most vital tasks you’ll undertake is changing the strings. Surprisingly, this simple regular maintenance can have far-reaching implications for the instrument’s neck, which can warp under improper handling. Whether you’re a beginner or a seasoned guitarist, understanding the right order to change your strings is crucial. This extensive guide aims to break down the process, explaining why changing guitar strings in the right order is essential for keeping your guitar’s neck healthy and your sound vibrant.
Understanding Guitar Neck Warping
Before delving into the string-change process, it’s essential to comprehend what neck warping is and how it can affect your playing experience. The neck of a guitar is subjected to a variety of stresses, primarily from the tension of the strings. When you change strings, especially if you do so improperly, you alter this tension, which can lead to warping.
Neck warping refers to the bending or twisting of the guitar neck, often caused by uneven tension distribution. This can result in action and intonation problems, making the guitar difficult or impossible to play. Warping can manifest as a concave or convex curvature, leading to fret buzz or high action, respectively.
Why Is Changing Strings Important?
Regularly changing your guitar strings can:
- Improve Sound Quality: Fresh strings produce a brighter and clearer tone, while old strings tend to sound dull and lifeless.
- Reduce Tuning Instability: New strings hold their tuning better, making your guitar more reliable during practice or performance.
- Enhance Playability: Over time, strings accumulate dirt and wear. New strings provide a smoother and more responsive playing experience.
Tools & Materials Needed
Here’s what you’ll need to change your guitar strings properly:
- New Strings: Make sure to choose the right gauge and type (nylon, steel, coated, etc.) for your guitar.
- String Winder: This tool can speed up the process of winding and unwinding strings.
- Wire Cutters: Useful for trimming excess string length after installation.
- Tuner: For getting your guitar back in tune after restringing.
- Capo (optional): Helpful for checking neck relief.
- Lemon Oil or Fingerboard Cleaner: To clean the fretboard before string installation.
Step-by-Step Guide to Changing Guitar Strings
Step 1: Prepare Your Workspace
Find a clean, flat surface where you can work comfortably. If you’re working with an electric guitar, you might want to place a towel or soft cloth on the workspace to avoid scratching the finish.
Step 2: Remove the Old Strings
-
Loosen the String Tension: Starting with the highest string (E), use a string winder or your hands to loosen it. Be careful not to release too much tension at once, as this can lead to neck warping.
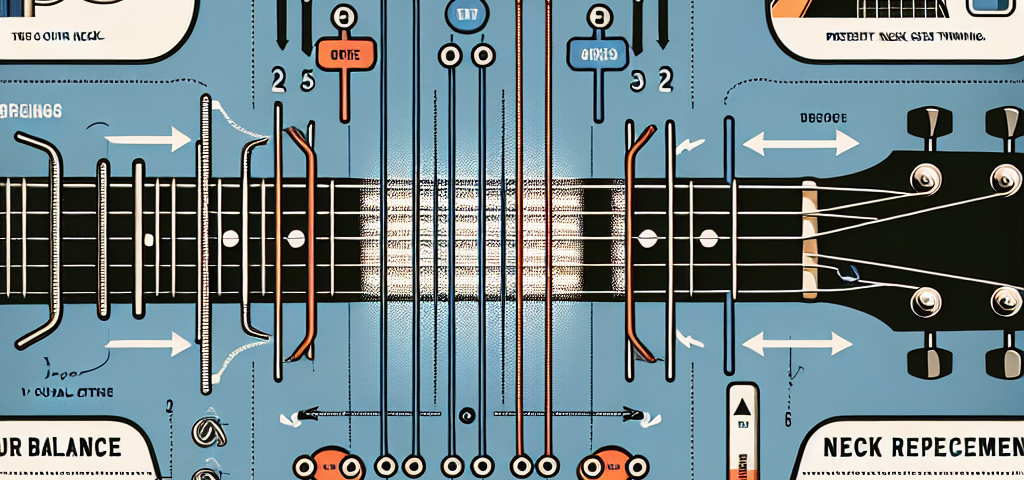
- Remove the Strings: Once the tension is sufficiently relieved, unwind the string from the tuning peg and detach it from the bridge. Repeat this process for each string, working from the highest (thinnest) to the lowest (thickest) string. Some players prefer to change strings in the opposite order, but this can cause uneven tension release, leading to possible neck issues.
Step 3: Clean the Fretboard
Before installing new strings, it’s an excellent time to clean your fretboard. Dirt and grime can build up, affecting playability and tone. Use a fretboard cleaner or lemon oil on a soft cloth to gently wipe down the surface of the fretboard. Make sure to avoid getting any cleaner on the body of the guitar.
Step 4: Install the New Strings
-
Select the Correct Strings: Ensure you have the right gauge and type of strings. Generally, lighter gauge strings are easier to play but may not provide the same depth of sound as heavier strings.
-
Attach the Strings at the Bridge: Begin with the low E string. Thread the string through the bridge and pull it snugly but not excessively tight.
-
Thread Through the Tuning Peg: Bring the string up to the tuning peg. Insert the string through the hole and ensure it is seated correctly.
-
Winding the String: Begin winding the string around the tuning peg, taking care to wind evenly from the bottom up. This method prevents slippage and helps maintain optimal tuning stability. Use your string winder to expedite this process.
- Repeat for All Strings: Continue this process for all strings, ensuring you always start with the highest string first. This method minimizes uneven tension on the neck.
Step 5: Tuning and Stretching
-
Tune Your Guitar: Once all strings are installed, use your tuner to bring your guitar up to pitch.
- Stretch the Strings: Gently tug on each string along its length. This helps set the strings and allows them to stabilize. Re-tune as necessary.
Step 6: Check the Neck Relief
To ensure your guitar’s neck is not overly bowed or warped, check the neck relief. Place a capo on the first fret, press down on the last fret, and measure the gap at the 8th fret. It should preferably be around 0.25 mm. If there’s more or less, you may need to adjust the truss rod.
Tips for Preventing Neck Warping
To keep your guitar’s neck healthy and prevent warping, consider the following tips:
- Humidity Control: Guitars are sensitive to changes in humidity. Use a guitar humidifier if you live in a dry climate.
- Temperature Awareness: Extreme temperature swings can lead to wood expansion and contraction. Avoid placing your guitar near heaters, air conditioners, or windows.
- Regular Maintenance: Consider periodic adjustments from a guitar technician, especially if you notice changes in playability.
- Mind Your Playing Environment: If you’re gigging frequently, be conscious of how you’re transporting and storing your guitar.
Conclusion
Changing your guitar strings is an essential part of maintaining your instrument’s sound and playability. By understanding the correct order for changing strings, you can prevent neck warping and prolong the life of your guitar. Following the steps outlined in this guide will not only keep your instrument in top condition but also enhance your overall playing experience. Whether you’re a beginner or an experienced musician, knowing how to change strings properly will empower you to take better care of your instrument and, ultimately, produce better music.
Frequently Asked Questions
Q1: How often should I change my guitar strings?
A: The frequency of string changes depends on how often you play. If you play daily, changing strings every week or two is advisable. For occasional players, once a month may suffice.
Q2: Does changing strings in the wrong order really matter?
A: Yes, changing strings in the wrong order can lead to uneven tension, which can warp the neck. It’s best to remove and replace strings starting from the highest to the lowest.
Q3: How can I tell if my guitar neck is warped?
A: Look for uneven bowing in the neck or fret buzz. Additionally, measure the neck relief with a capo at the first and last fret to see if the gap at the 8th fret is within the normal range.
Q4: Can I use a string winder on all types of guitars?
A: Most electric and acoustic guitars allow for the use of a string winder. However, make sure that the winder is compatible with your tuners.
Q5: Should I lubricate the nut when changing strings?
A: Yes, applying a small amount of lubricant (like graphite powder or nut sauce) to the nut can help prevent string binding, improving tuning stability.
Q6: What is the best string gauge for beginners?
A: Lighter gauge strings (e.g., .009-.042 for electric guitars) are often recommended for beginners as they’re easier to press down and bend, facilitating improved comfort and playability.
Q7: Will using different strings affect my guitar’s setup?
A: Yes, changing string gauges can alter the tension on the neck, potentially affecting the action and neck relief. A subsequent setup might be necessary after a significant gauge change.
Q8: How do I know which type of strings are best for my guitar?
A: It largely depends on your playing style and preferences. Experiment with different materials (e.g., nickel-plated steel, pure nickel, cobalt) to find what suits you best.
With this comprehensive guide, you should feel equipped to handle your guitar string changes confidently while keeping your instrument in optimal condition. Happy playing!
