Sourdough bread, with its unique tang and complex flavors, is a favorite among home bakers and professional artisans alike. At the heart of this culinary delight lies the sourdough starter, a living culture of wild yeast and bacteria. Maintaining a healthy, vigorous starter is essential for the best baking results. In this comprehensive guide, we will delve into the secrets of nurturing a thriving sourdough starter, offering essential maintenance tips, troubleshooting advice, and frequently asked questions to ensure your starter flourishes.
Understanding the Basics of a Sourdough Starter
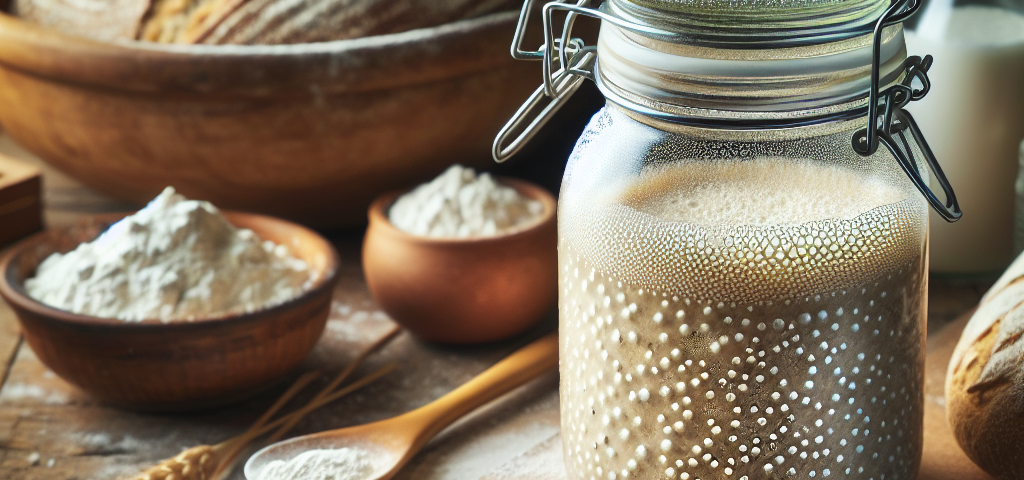
A sourdough starter is a blend of flour and water that captures wild yeast and lactobacilli from the environment. This blend ferments over time, allowing the community of microorganisms to develop and multiply. The wild yeast is responsible for leavening the dough, while the bacteria produce lactic acid, giving sourdough its characteristic flavor.
Key Components of a Sourdough Starter
-
Flour: The type of flour you use can impact the flavor and strength of your starter. Bread flour, with its higher protein content, often yields a more vigorous starter, while whole grain flours provide additional nutrients and flavor.
-
Water: It’s important to use chlorine-free water, as chlorine can inhibit yeast growth. Many bakers prefer filtered or bottled water for this reason.
-
Temperature: Yeast and bacteria thrive at warmer temperatures—ideally between 70°F and 75°F (21°C to 24°C). Your starter’s location can significantly impact its fermentation process.
- Time: Fermentation takes time, and patience is essential. A healthy starter can take 5 to 14 days to develop fully, depending on environmental factors.
Creating Your First Sourdough Starter
To create a new sourdough starter, you’ll only need flour and water. Here’s a simple method to get you started:
Ingredients
- Whole wheat or rye flour (1 cup)
- Filtered water (1 cup)
Instructions
-
Day 1: In a clean, glass container, mix the flour and water until thoroughly combined. The mixture will resemble a thick paste. Cover the container with a breathable cloth (like a linen napkin or coffee filter) and secure it with a rubber band. Leave it at room temperature for 24 hours.
-
Day 2: You may not see much activity yet, but that’s normal. Discard half of the mixture and add another 1 cup of flour and 1 cup of water. Mix well and cover again.
-
Days 3-7: Continue the same process of discarding and feeding once every day. By day 3 or 4, you should start seeing bubbles and may even notice a slight rise in the mixture.
- Day 7: By this point, the mixture should be bubbly, have risen, and have a tangy smell. Your starter is now ready to be used for baking or can be maintained for future use.
Essential Maintenance Tips for a Thriving Sourdough Starter
-
Feed Regularly:
- If you want to maintain a thriving starter, feeding is essential. A typical feeding schedule is every 12 to 24 hours at room temperature or once a week if stored in the refrigerator.
-
Adapt Your Feeding Ratios:
- A common ratio is 1:1:1 (equal parts starter, water, and flour by weight). However, to enhance your starter’s vigor, you may choose to use a larger or smaller amount of starter as you feed (e.g., 1:2:2 for more frequent feedings).
-
Monitor Consistency:
- The consistency of your starter is also crucial. It should be thick but pourable, similar to pancake batter. Adjust water or flour accordingly if it feels too dry or wet.
-
Keep It Warm:
- For optimal fermentation, keep your starter in a warm place away from drafts. A turned-off oven or a microwave works well. Invest in a proofing box or use a heating mat if your home is particularly cool.
-
Use the Right Flour:
- Experiment with different flours—whole wheat and rye are excellent for starter health due to their higher nutrient content. Once established, you can switch to all-purpose flour for maintenance.
-
Maintain Cleanliness:
- Clean your container periodically to prevent mold or undesired bacteria. Rinse it out with warm water (no soap) and dry thoroughly before adding fresh starter.
-
Observe Signs of Life:
- Your starter should bubble and double in size within 4-6 hours after feeding. If it’s sluggish, consider adjusting your feeding schedule or ratios.
-
Utilize Discard:
- Sourdough discard can be used in many recipes—pancakes, waffles, muffins, and crepes—minimizing waste and enhancing flavors in baked goods.
-
Refrigeration for Long-Term Storage:
- If you need a break from baking, store your starter in the refrigerator. It can be fed once a week. Allow it to come to room temperature and feed it properly before using it again.
- Hydration Levels:
- Some bakers prefer a stiffer starter (low hydration) for more robust flavors and stability. Others lean towards a higher hydration starter for increased fermentative activity. Adjust based on personal preference.
Troubleshooting Common Issues
Understanding common problems can help you maintain a healthy sourdough starter.
-
Lack of Bubbles:
- If your starter doesn’t bubble after feeding, it may need more frequent feedings, a warmer environment, or a different type of flour.
-
Layer of Liquid (Hooch):
- If you notice a layer of liquid on top of your starter, it’s a sign that it’s hungry. Stir the hooch back in or pour it off, then feed your starter.
-
Off Smells:
- A healthy starter should smell pleasantly sour. If it smells bad (like rotten or very pungent), it might have developed unwanted bacteria. Discard it and start anew.
-
Mold Growth:
- If you see mold, discard the starter immediately. Clean your container thoroughly before establishing a new starter.
-
Darkening Color:
- Over time, some starters can darken, especially if they’re being fed with whole grains. This is usually normal, but if it’s combined with off-smells, it could indicate a problem.
- Sluggish Activity After Refrigeration:
- If your starter has been in the fridge and shows little activity after feeding, it may need a few more feedings at room temperature to revive it.
Advanced Maintenance Techniques
Once you have a strong starter, consider exploring advanced techniques for maintaining its vigor and flavor.
-
Refresh Your Starter:
- If your starter seems sluggish, refresh it by discarding a large portion and performing an intensive feeding using 1:2:2 ratios.
-
Experiment with Hydration:
- Different hydration levels can yield different textures and flavors in bread. Try varying the water content to find your ideal dough recipe.
-
Try Different Flours for Feeding:
- Incorporate various types of flour in your feedings to enhance flavor complexity.
-
Less Frequent Feedings:
- If you find your starter thriving despite less frequent feedings, consider this new rhythm. However, always observe changes carefully.
- Drying Your Starter:
- For long-term storage, consider drying your starter. Spread a thin layer of it on parchment paper, let it dry completely, and store the flakes in an airtight container.
Conclusion
Creating and maintaining a thriving sourdough starter is both an art and a science. By understanding the basics and following essential maintenance tips, you can harness the wild yeast and bacteria to produce delicious, flavorful sourdough breads. Embrace the uniqueness of your starter’s journey as it evolves with time and care, resulting in a baking experience that connects you to a timeless tradition.
With patience, practice, and the right techniques, your sourdough starter can become a beloved staple in your kitchen, yielding loaves that are not only nourishing but also bursting with flavor and history.
Frequently Asked Questions (FAQ)
1. How often should I feed my sourdough starter?
Generally, you’ll want to feed your starter every 12 to 24 hours if kept at room temperature. If you store it in the fridge for long periods, once a week is sufficient.
2. Can I use all-purpose flour for my sourdough starter?
Yes, you can use all-purpose flour, but using whole grain flours can enhance yeast activity and flavor due to their higher nutrient content.
3. What should I do if my starter is not bubbling?
Check the temperature, ensure you’re feeding regularly, and consider adjusting the feeding ratios or the flour type used.
4. Is it necessary to discard starter before feeding?
Yes! Discarding some of the starter during feedings keeps the microorganism population balanced and ensures your starter remains active.
5. What is the best way to store my sourdough starter for long periods?
The refrigerator is the best place for long-term storage. Feed it once a week and bring it to room temperature before using.
6. Can I use my starter immediately after feeding?
It’s best to wait until your starter has peaked in activity—bubbly and doubled in size—before using it for baking.
7. How can I tell if my sourdough starter is ready for baking?
Your starter should be bubbly, have doubled in size, and smell pleasantly sour. Additionally, it should pass the "float test"—take a small spoonful of starter and drop it in water; if it floats, it’s ready!
8. How do I make my sourdough starter more sour?
For a tangier flavor, consider using whole grain flours, extending the fermentation time by allowing it to sit longer during feedings, or feeding it with a higher percentage of whole grain flour.
9. What if I see a layer of liquid on top of my sourdough starter?
This liquid, known as hooch, indicates your starter is hungry. You can either stir it back in to reintroduce the liquid or pour it off and feed the starter with fresh flour and water.
10. Can I freeze my sourdough starter?
Yes, you can freeze it. Spread a thin layer on parchment paper, let it dry, then store it in an airtight container. When you’re ready to use it, rehydrate by mixing it with water and flour.
By following these tips and addressing common issues, you can create and maintain a healthy sourdough starter that yields delicious bread with each baking endeavor. Happy baking!
